How to setup Loyalty Program manually?
Rivyo Loyalty Program offers customizable widgets that you can embed in your Shopify store to display customers with your loyalty widget. Below is a guide explaining what each widget code does.
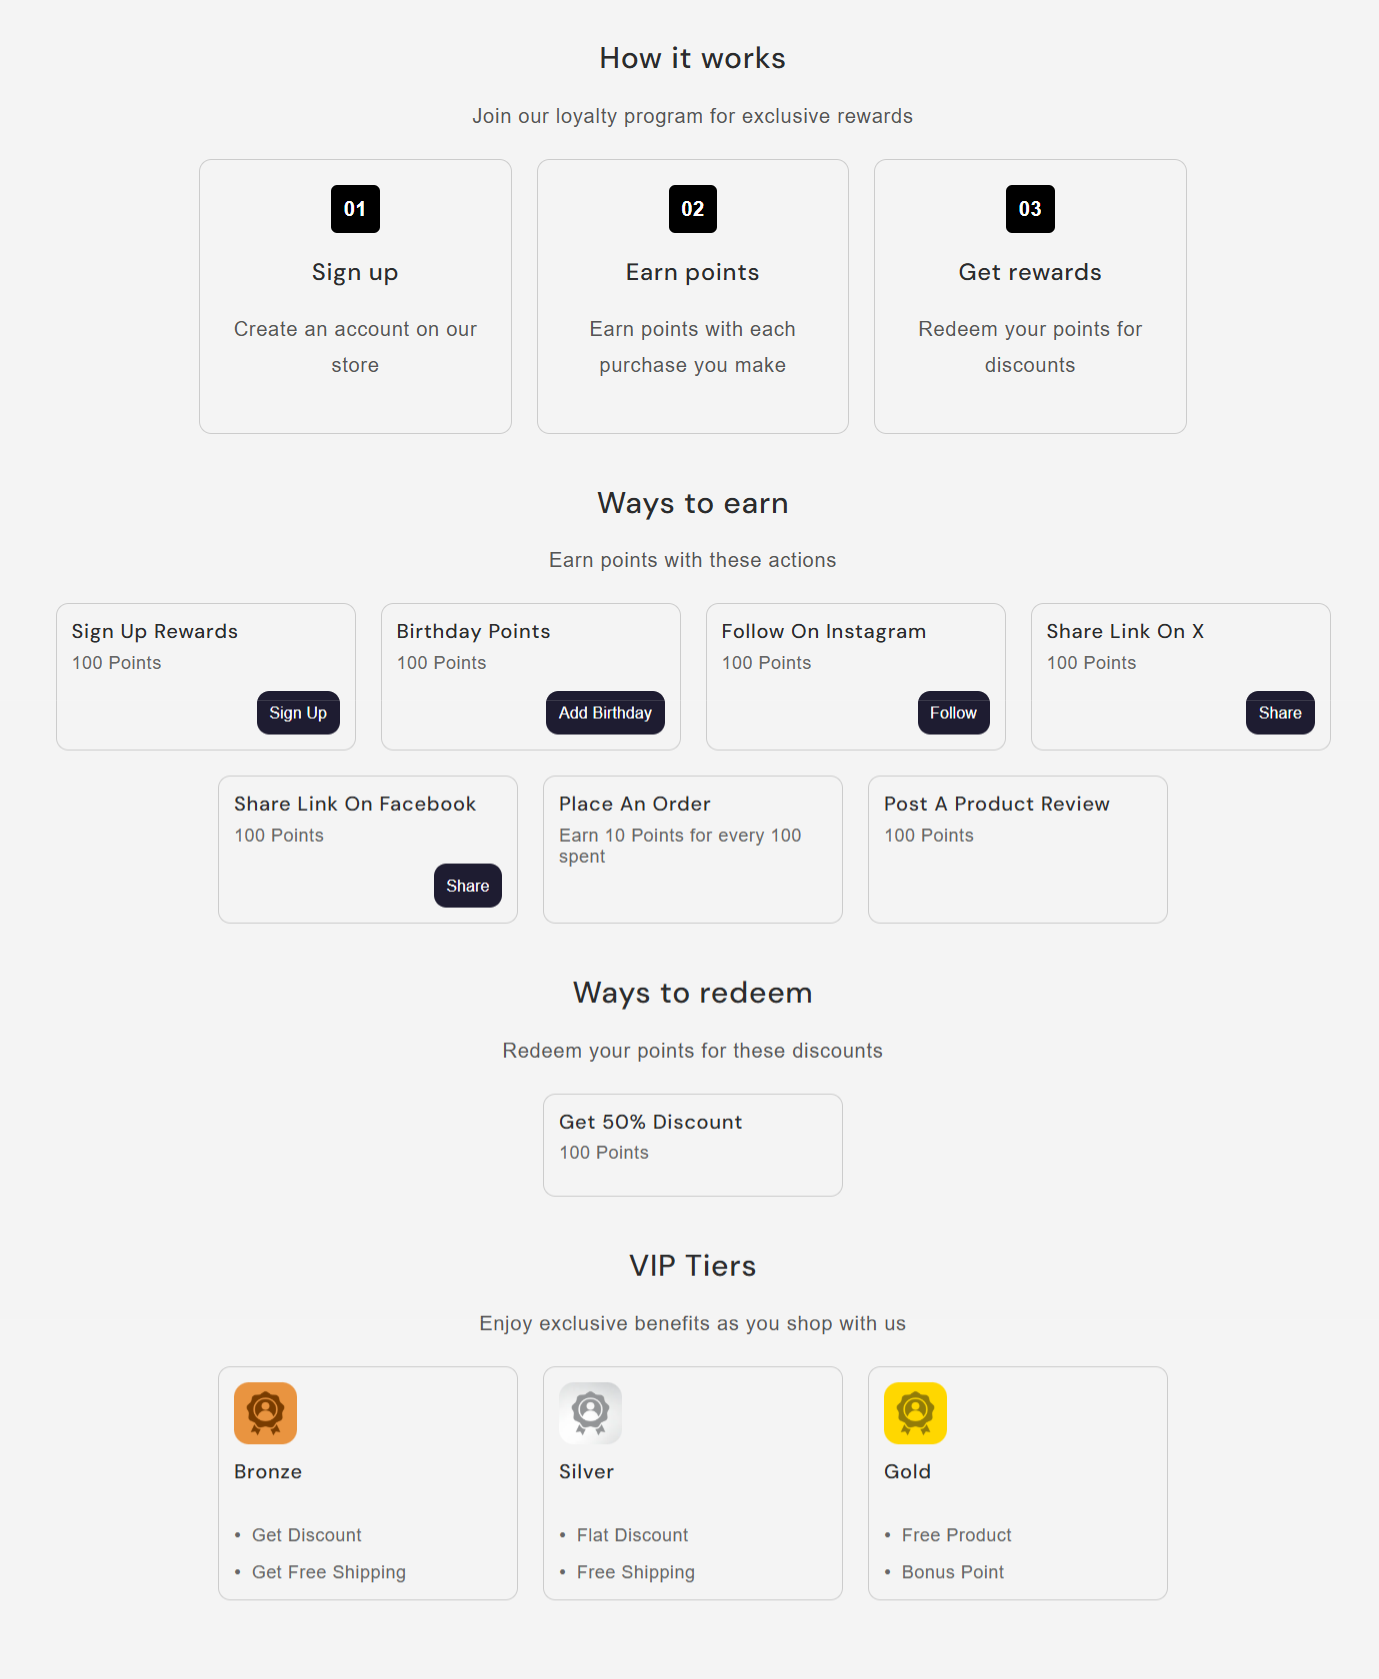
1. Loyalty Program Overview Widget
Use this code to display a full-page loyalty program overview to your customers, including sections like "How it works," "Ways to earn," "Ways to redeem," and "VIP tiers."
<div id="wc_rivyo_loyalty_how_to_work" class="wc_rivyo_loyalty_how_to_work" data-url="{{ shop.url }}"></div>
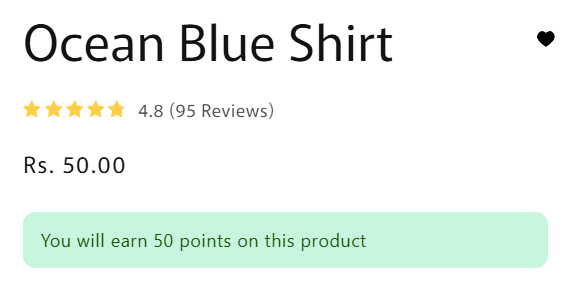
- Product Points Earned Display
Show customers how many loyalty points they can earn by purchasing a specific product using this widget.
<div id="wc_rivyo_loyalty_points_earn" class="wc_rivyo_loyalty_points_earn" data-url="{{ shop.url }}" data-handle="{{ product.handle }}" data-product_id="{{ product.id }}" data-limit="0"></div>
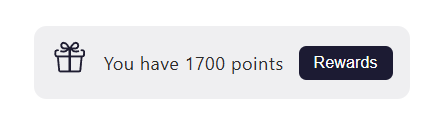
- Customer Points Summary
This widget shows customers the total loyalty points they have available to apply as discounts with the reward button.
<div id="wc_loyalty_apply_discount_cart" class="wc_loyalty_apply_discount_cart"></div>
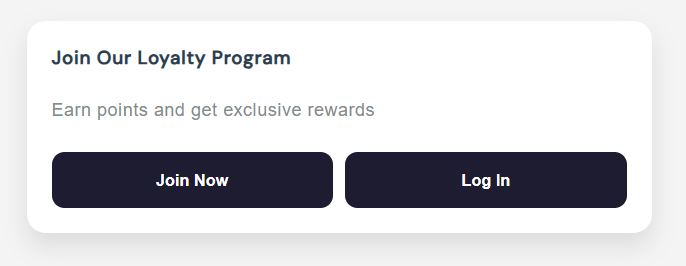
- Join or Member Loyalty Widget
Use this widget to allow customers to join the loyalty program or, if logged in, show their current points and redemption options along with the VIP tier option if enabled.
<div class="wc_rivyo_loyalty_program"></div>
This manual method empowers you to flexibly place loyalty program elements anywhere in your Shopify storefront, providing clear visibility of points, earning opportunities, and redemption options directly to your customers.
If you experience any issues during setup, feel free to contact our support team at support@webcontrive.com. We’ll be happy to assist you and ensure everything is set up correctly on your store.